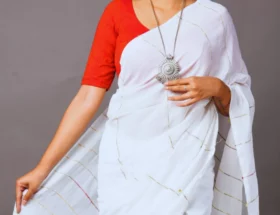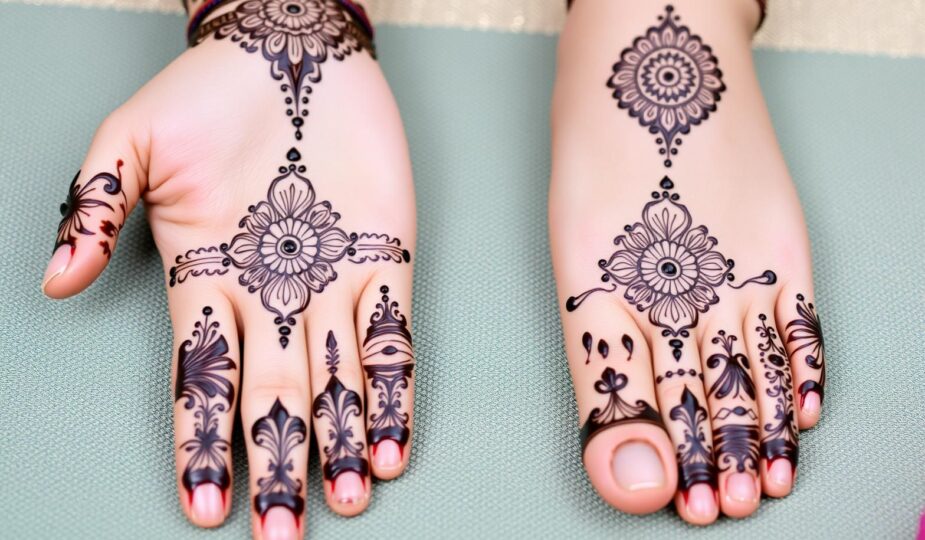
How to Create Stunning Designer Mehndi Designs for Hands Perfectly
Designer Mehndi Designs – the mesmerising alchemy of henna entwined in tradition, elegance, and poetic ornamentation. This is not just decoration; it is a tradition with culture and ceremony, a celebration on the skin. Regardless of you are making arrangements for a big wedding celebration, going to an exciting festival, or simply playfully creating art on a quiet night, putting remarkable designer mehndi patterns on your hands is fun and private. But to translate this mystic medium into stunning artistry, one must traverse through patience, precision, and practice. Let’s traverse this rich path and elevate your hands into living, breathing masterpieces.
Setting the Stage for Your Designer Mehndi Journey
Before the first flourish is drawn, curate your artistic sanctum. Imagine an atelier rather than a workspace. Your essentials? A meticulously crafted henna cone—opt only for the pure, botanical variant, untainted by synthetics. Arm yourself with cotton tips or delicate cloths for soft corrections (imperfection is inevitable—it’s human). A modest bowl of clean water offers reprieve for your tools. Augment your palette with a few aromatic elixirs like eucalyptus or tea tree essence; these not only enrich pigment but also offer solace to sensitive skin. Lastly, find solace in a serene spot—a nook with ample light and an unshakable surface. Comfort isn’t a luxury; it’s the spine of focus.
Curating the Ideal Designer Mehndi Aesthetic
Within the abundant ocean of designer mehndi designs artistry lies a multitude of stylistic expressions. Sifting through digital archives, cultural manuscripts, or even ancestral heirlooms can awaken your muse. Let context be your compass—a minimalist stroke suits quotidian grace, while opulent patterns befit celebratory grandeur. Let the motif mirror your soul. For initiates, simplicity isn’t weakness—it’s the scaffolding of mastery. Begin with foundational strokes; as your hand steadies and your confidence flourishes, allow complexity to unfurl naturally. Each swirl becomes your fingerprint in the tapestry of tradition.
Cultivating the Craft: Techniques in Motion
And now, the enchantment begins. Designer Mehndi Designs isn’t painted—it’s woven. Initiate with gentle pressure, a whisper of henna upon the skin. Draw the outer frame with deliberate care—your blueprint must be precise. Inhale the moment, exhale into the rhythm of your lines. As you progress inward, fill the negative space with intentional strokes, weaving symmetry and silence. Let your lines breathe; fine strokes evoke an air of ethereal sophistication. Experiment with motion—alter pace, depth, curvature. There’s poetry in variance. Repetition is your silent tutor. Each design is a rehearsal for the next revelation.
Weaving Your Signature into the Pattern
Why mimic when you can metamorphose? Personalize your mehndi with symbols and sentiments close to your heart. Integrate florals that echo your spirit, paisleys with tales to tell, or geometric fragments that pulse with mystery. Inscribe initials, embed whispers of your narrative. Let the design meander with harmony—each arc, each dot, part of an intentional cadence. Seek inspiration from global tapestries—merge the classical with the avant-garde. Mehndi isn’t merely ornamental—it’s autobiographical.
Preserving the Essence of Your Creation
Once the last tendril has been traced, honour your handiwork. Let the paste dry in sacred stillness—rushing mars the alchemy. Resist the temptation to cleanse your hands for a generous span; patience deepens the hue. Post drying, massage a kiss of natural oil—coconut or sesame—into your palms to seal the pigment and maintain suppleness. Over the ensuing hours, and even days, the stain will mature, transitioning from a dusty rust to a deep, burnished auburn.
Navigating the Panorama of Designer Mehndi Designs Tradition
The mehndi cosmos is vast, a kaleidoscope of cultural lexicons. Embrace the fluid elegance of Arabic motifs, with their meandering vines and vacant spaces. Admire the labyrinthine Indian designs, precise and ceremonial. Explore Pakistani flair—bold, daring, yet rooted. Each school has its signature; each pattern, a dialect. Sample them, learn from them, and then evolve beyond them. The canvas is yours—blend, distort, innovate.
FAQ
Q: How much time does it take for mehndi to truly set?
A: The superficial layer may dry within 2 to 3 hours, but to unlock its full chromatic potential, allow it to remain undisturbed for at least 6 to 8 hours.
Q: How enduring is the tint of designer mehndi?
A: Typically, its beauty lingers for 7 to 14 days—though this depends on your skin’s chemistry and the care bestowed upon it.
Q: Can henna paste be re-utilized?
A: Reuse is ill-advised. Once exposed, the paste loses vitality, sacrificing depth and intensity in subsequent applications.
Q: What if I falter mid-design?
A: Be gentle. A moist cotton tip can erase minor missteps while the paste is still wet. Embrace flaws—they often birth originality.
Q: Are there risks in applying henna?
A: Only if it’s adulterated. Always seek natural, unblemished henna. Avoid formulations with additives like PPD, which can provoke adverse reactions. A patch test is not optional—it’s essential.
Q: Where does inspiration dwell?
A: Everywhere. Pinterest, Instagram, folktales, architecture, fabrics—art breathes all around. Stay curious.
As you summon your materials and settle into your creative sanctuary, remember—mehndi is not just application; it is invocation. A blend of heritage and heart. With time, every swirl will feel like second nature, and your hands will echo with stories spun in silence. Keep your lines bold, your patience deeper—and let the henna sing.